
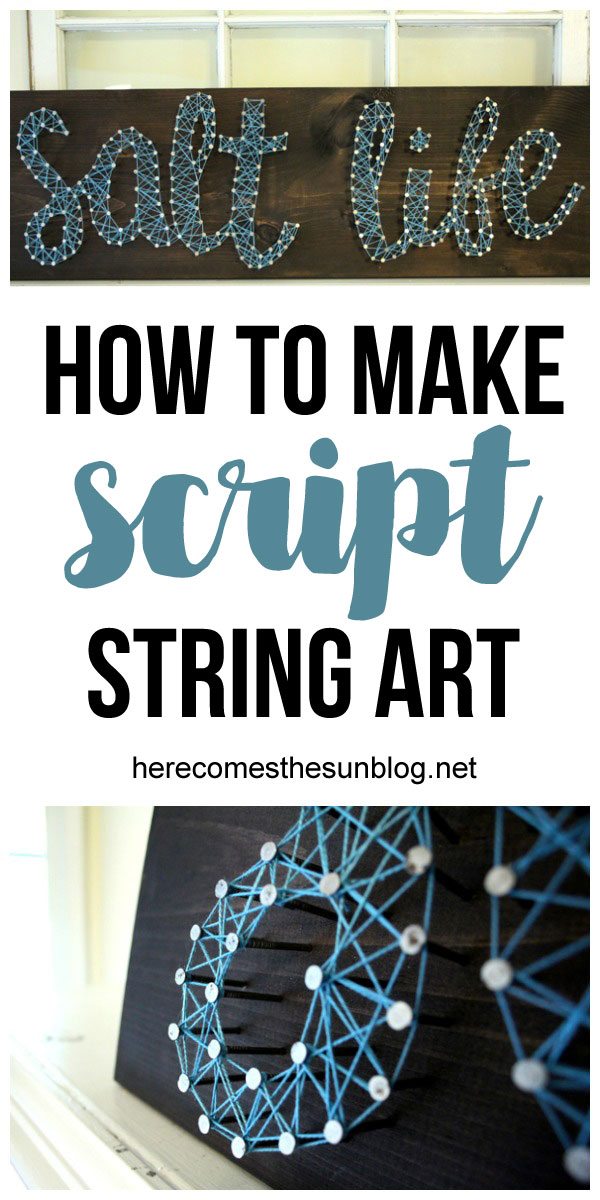
How to Make Script String Art
Script string art is easy to make and makes a big statement in any room.
String art. I’ve been swooning over it lately. The possibilities are seriously endless to what you can create. You just need a few simple tools and a bit of patience and you can make a gorgeous statement piece for your home.
PIN THIS FOR FUTURE REFERENCE
If you are a regular reader, you know I live at the beach. My home is decorated in a style I call Coastal Farmhouse… lots of wood with blues and greens as the color palette. I like to decorate my home with signs which is why this Script String Art is perfect. I chose the words “Salt Life” because that’s pretty much what defines my family. If it’s the weekend during the summer, we are at the beach. We live and breathe the salty air and I wouldn’t have it any other way.
SCRIPT STRING ART SUPPLIES
The amount of material will vary depending on the type of string art that you want to make. Here are the basics. Adjust accordingly depending on your design.
Wood
Stain or paint (optional)
Nails (I used 1 1/2″)
Hammer
Stencil
Yarn or embroidery floss
To make script string art, first prep your wood with paint or stain. This is of course optional. I had my board already stained from a project I never completed.
Next, you’ll need a stencil. I found a script font that I liked and printed it out. Then I cut out each letter separately so I could arrange them individually on my piece of wood.
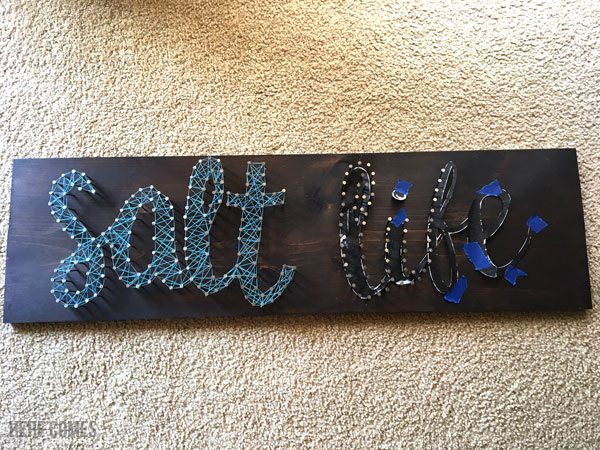
Place the stencil on the wood and hammer the nails in around the stencil, making sure to space them evenly. I used a few pencils to space my nails out. There may be some places where the nails can’t fit evenly and that is ok. Just do your best to make sure that it doesn’t look wonky. The photo below shows multiple stages of the project so you can see how it comes together. On the word “life, you can see how I added the nails around the stencil.
If you want to create a perfect template with a Silhouette machine, here is a great tutorial.
Once you have all your nails in, remove the stencil, tie the end of the embroidery floss around a nail and begin to wrap around the outside of the letters. Continue to wrap only around the outside so you have an outline. Also be sure to wrap around any “holes” in the middle of the letters.
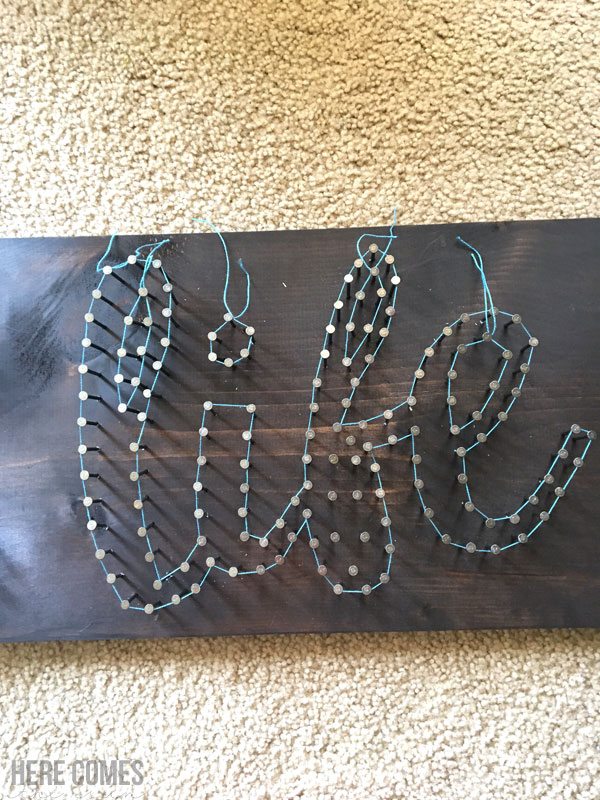
Once the outline is done, start wrapping on the inside. There really is no right or wrong way to do this. And if you don’t like how something looks, just unwrap it and start again. When you’re done, tie off the end of the string around a nail.

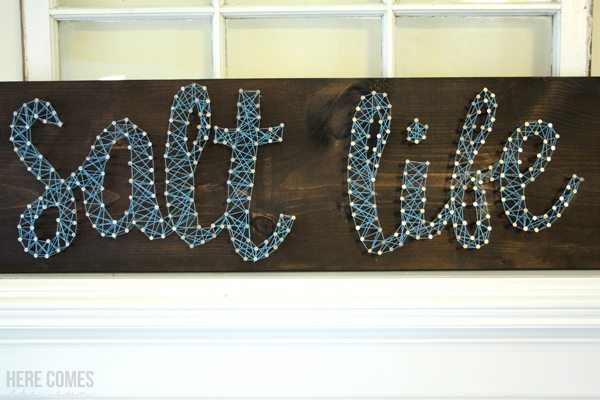
This Script String Art is the perfect addition to my home.
For another easy home decor sign, check out this post.
Hi Kelly! I love this font. Do you know the name of the font?
Hi Michelle. Unfortunately I don’t remember what font I used. Sorry.
Thanks for responding, Kelly. 🙂