
No Carve Hand Lettered Pumpkin Decor
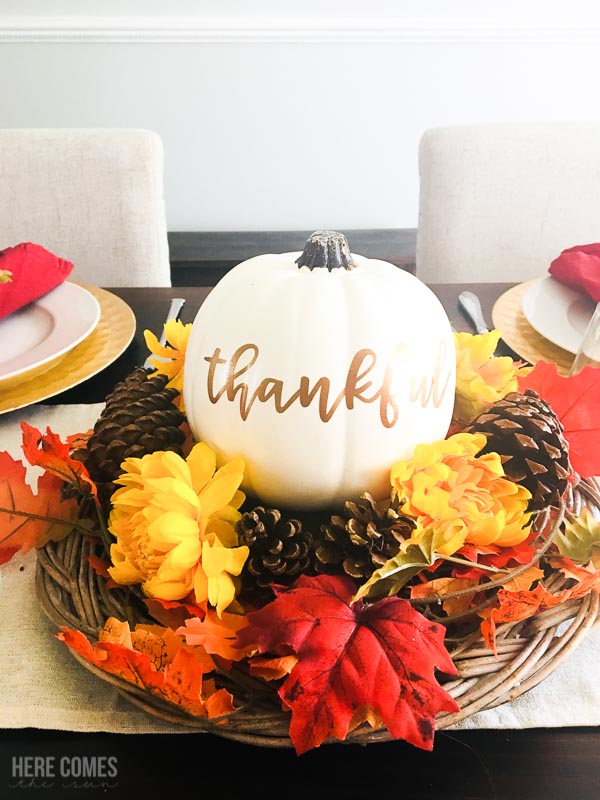
This hand lettered pumpkin decor is perfect for your Fall or Thanksgiving tablescape. It all works well anywhere else in your home.
The cooler fall weather is FINALLY here and I can start to think about pumpkin decor. I know many of you have probably had pumpkins on the brain since August but I just really can’t get into the fall mode until the temperature dips below 80 degrees. When it gets down to 80, people around here break out their full fall garb. I’m talking jeans, sweaters, scarves. It’s kinda nuts. But since Thanksgiving is coming up relatively soon, I’m sharing an easy hand lettered pumpkin decor project.

HAND LETTERED PUMPKIN DECOR SUPPLIES
- Miss Magnolia font
- Expressions Vinyl
- Silhouette or Cricut
- Weeding tools
- Plastic pumpkin
HOW TO MAKE HAND LETTERED PUMPKIN DECOR
First things first. I’m going to cheat a bit here. Normally I would create hand lettering myself. But I know that many of you do not hand letter but still like the look of it. So, I’m going to use a hand lettered font today. It’s called Miss Magnolia and it’s one of my favorite fonts lately. I’ve used it for lots of recent projects like my DIY clipboard and sunshine cut file
Open up your Silhouette or Cricut software and create a new file. Next, using Miss Magnolia font, type the word “thankful”. Because you are typing directly into your cutting machine software, you don’t have to vectorize your font like you would if you were creating a file using Illustrator.
Once you have your word typed and sized to the correct size, simply cut it out, weed it, and apply transfer tape to your design.
QUICK TIP: I like to draw a box around my text to make the weeding process easier.


For those of you new to this process, weeding means removing all the excess vinyl around your letters that you do not want adhered to your pumpkin. If you need to know how to use transfer tape, here’s a short video tutorial.
The final step is to place your text onto the pumpkin. Make sure it is centered and level and then press the transfer tape onto the pumpkin. You can use a scraper to adhere it but I found that it was easier to just use my fingers to rub the vinyl into all the nooks and crannies of the pumpkin.

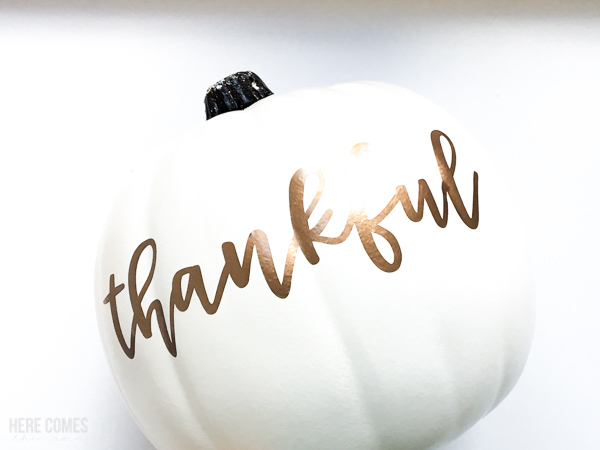
Peel off the transfer tape and you’re left with a beautiful hand lettered pumpkin decor that you didn’t even have to hand letter yourself!
WATCH THE VIDEO TUTORIAL
Here is an up close shot of the vinyl. It has a sort of metallic sheen to it which I love.

I’m looking forward to using this on my Thanksgiving table.
LOVE IT? PIN IT!

YOU MAY ALSO LIKE
Watercolor Pumpkin Spice Quote Print
Hand Lettered Watercolor Autumn Print