
The Easy Guide to Installing Fonts on Your Computer
This post was updated July 29, 2020
Installing fonts on your computer is easy with this step-by-step guide! Learn how download and install on a PC and Mac.
I have a love affair with fonts. I swoon over hand-lettered swirls and thick downstrokes. I have so many fonts on my computer and I find myself downloading and installing them at a faster and faster rate every day. Although installing fonts onto your computer may seem difficult, it is super easy.
The first step to installing fonts is to find a font that you like. Currently, I’m in love with hand-lettered script fonts and the place that I like to find them is Creative Market. I also recommend Design Cuts and So Fontsy

Ok, so you’ve found a font that you love. The next step to installing fonts is to download the font to your computer. Every font site should have some sort of “download” button. Just make sure not to click on ads that say “download”. Sometimes those ads will install malicious code onto your computer and that is NOT what you want.
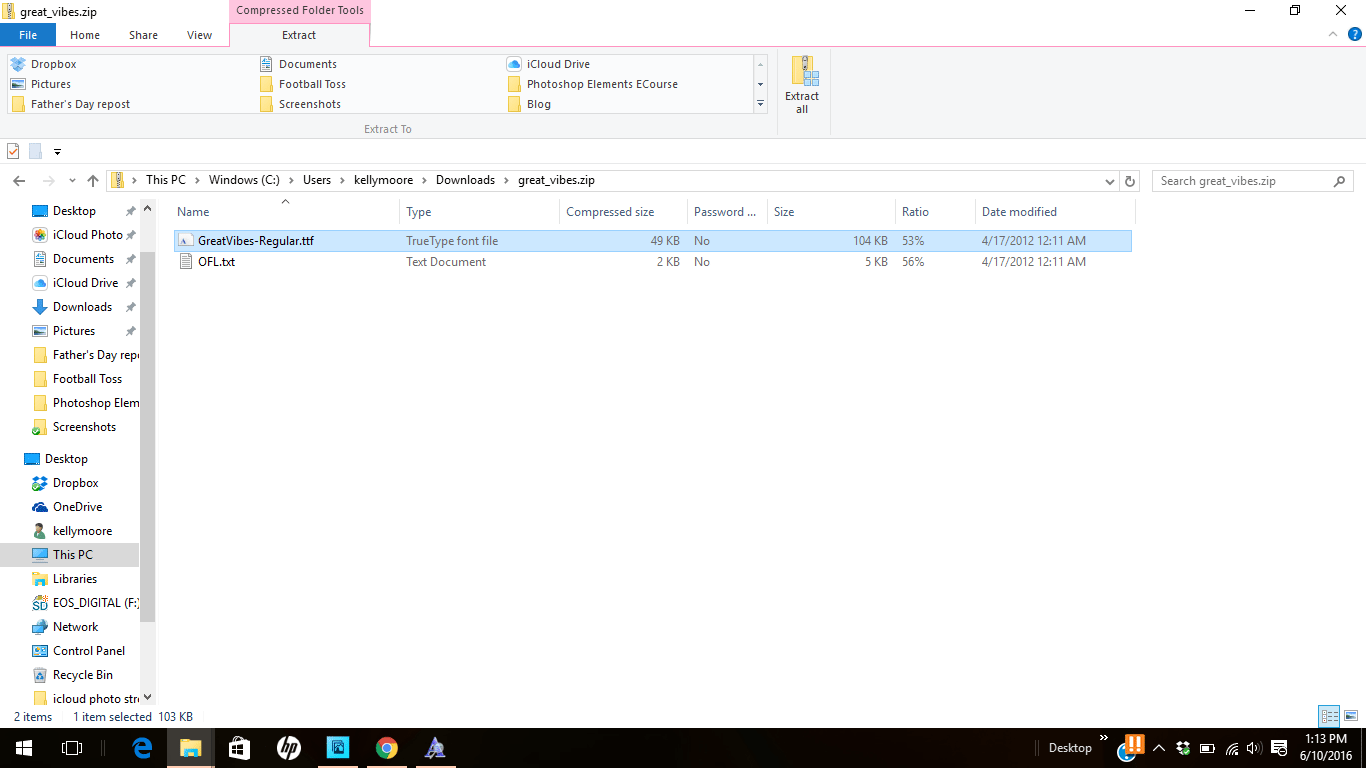
Navigate to your downloads folder (or wherever you saved the font file) and click on the file. On a PC, click “Extract All”.
On a Mac, double click the file and it will unzip into the downloads folder
Once your file is unzipped, double click on the font file. You’ll want to install the OTF version. OTF stands for Open Type Features and that is the version that allows you to access all the extras that come with some fonts such as alternate characters, swashes and doodles.
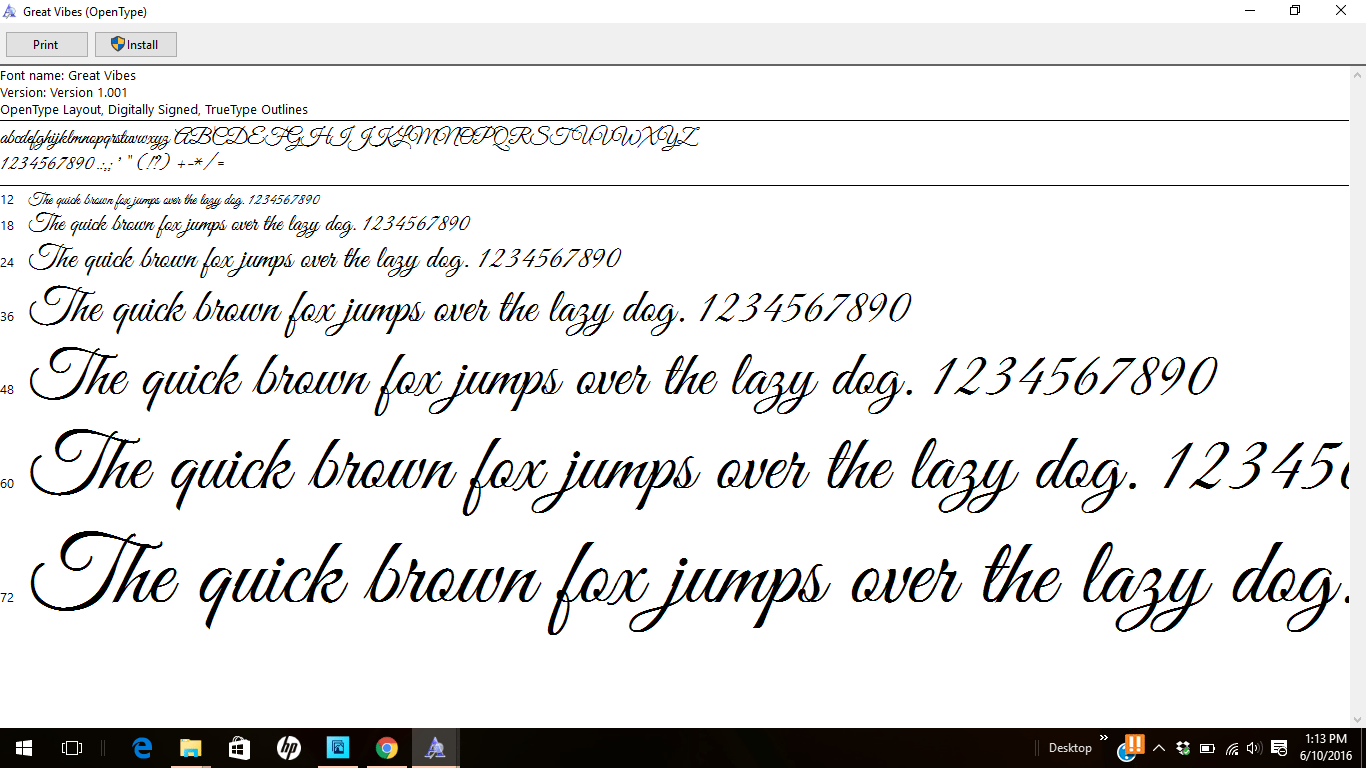
If using a PC, the window shown below will pop up. Click “Install” and the font will be installed on your computer and ready for use.
If using a Mac, right-click on the file and choose “Open With > Font Book”. Next click “Install” in the bottom right and your font will be installed and ready to use.
Pretty easy, right? One word of caution… make sure to save a copy of the file to the cloud or an external hard drive. We all know how computers like to crash and take all of our hard work with them. Creative Market has an awesome feature where everything that you purchase automatically syncs to your Dropbox account so you never have to worry! Creative Market also stores a list of all of your purchases so you can download them again if needed.
MORE FONT RELATED POSTS
- How to Pair Fonts Together – The Right Way
- The Best Fonts for Silhouette & Cricut
- Best Places to Find Commercial Use Fonts
- My Favorite Hand Lettered Fonts
- 10 Gorgeous Script Fonts
- 10 Beautiful Hand Drawn Fonts
- My Favorite Hand Lettered Fonts
FONTS CREATED BY ME
LOVE IT? PIN IT!

Excuse the ignorance of my question, but I’m wondering if I download some fonts to my MacBook, will they show up in my pages app? Where can I access them once I download them?
Hi Rachel. If you have Pages open, you’ll need to quit the application and open it again to access the newly downloaded font. Once you open the document again, highlight the text you want to change and hit Format>Fonts>Show Fonts or CMD-T. This will bring up a list of all the fonts.
Hope this helps