
DIY Envelope Closure Pillow
This post may contain links to affiliate websites, such as Amazon and we receive an affiliate commission for any purchases made by you using these links.
I have been dying to make some pillows! Last summer, I made these pillows . Although I love the way these turned out, they were only good for one summer because I used regular fabric and they got mildew on them from being outside in the humidity. UGH. This time around, I got smart and used outdoor fabric for these Envelope Closure Pillows.

I upcycled some old pillows to use as pillow forms.
Here is our living room from our old house and the old pillows:

We refer to these old pillows as “the 40 dollar pillows” because, that’s right, they cost $40 EACH! We bought 3 and somehow justified that spending $120 on pillows was ok. *GASP* This was obviously before we had kids and a budget.
But now, the $40 pillows are growing kind of ragged and beat up. They have been good to us over the past 8 years but they definitely needed an update.
Here’s how to do it…
MATERIALS
Pillow form (or old pillow)
Outdoor fabric
Rotary cutter and mat
Sewing machine and coordinating thread
DIRECTIONS
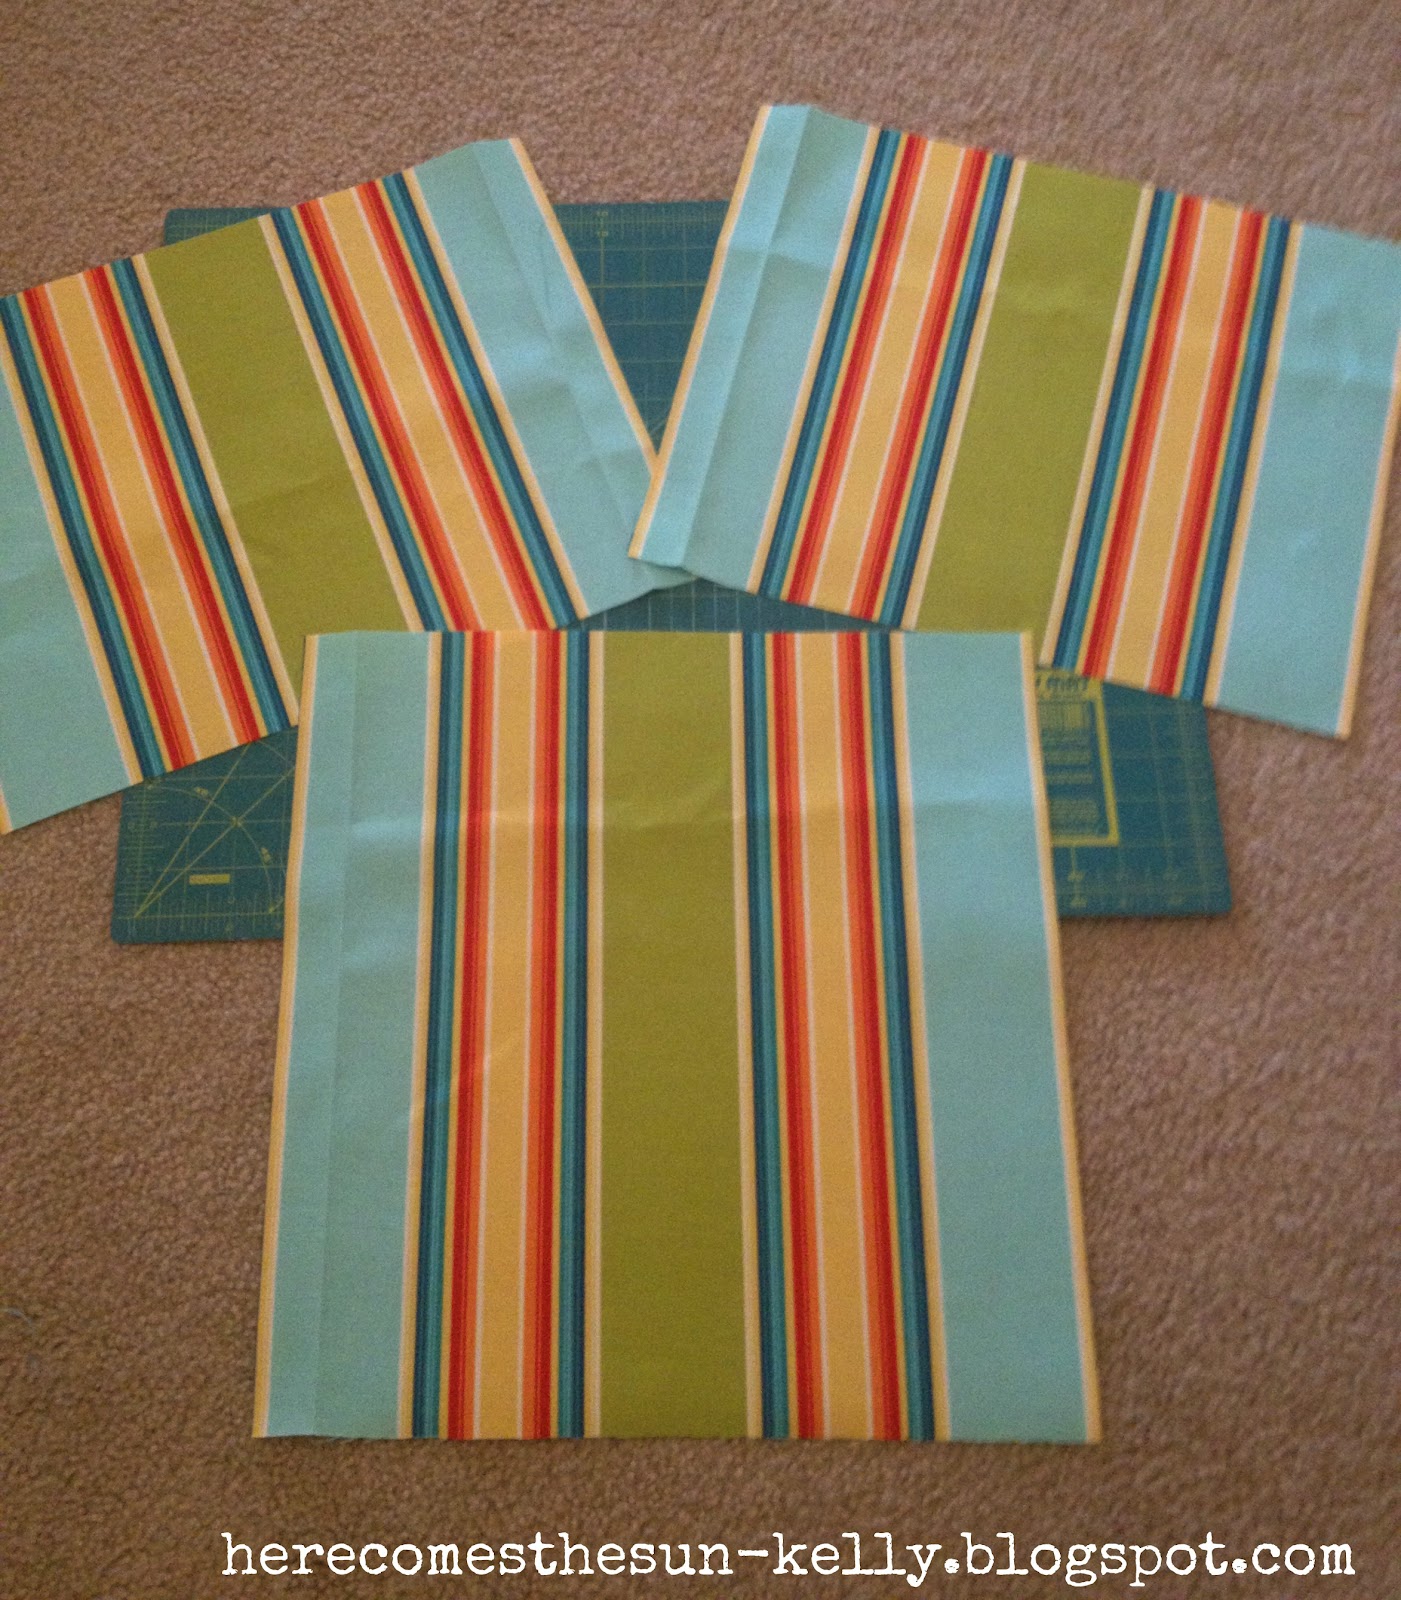
Measure your pillow form. Mine was 16.5″x16.5″
Cut the following pieces out of your fabric:
(1) 16.5″ x 16.5″ square (or the same dimensions as your pillow form)
(2) 16.5″ x 12.5″ rectangles
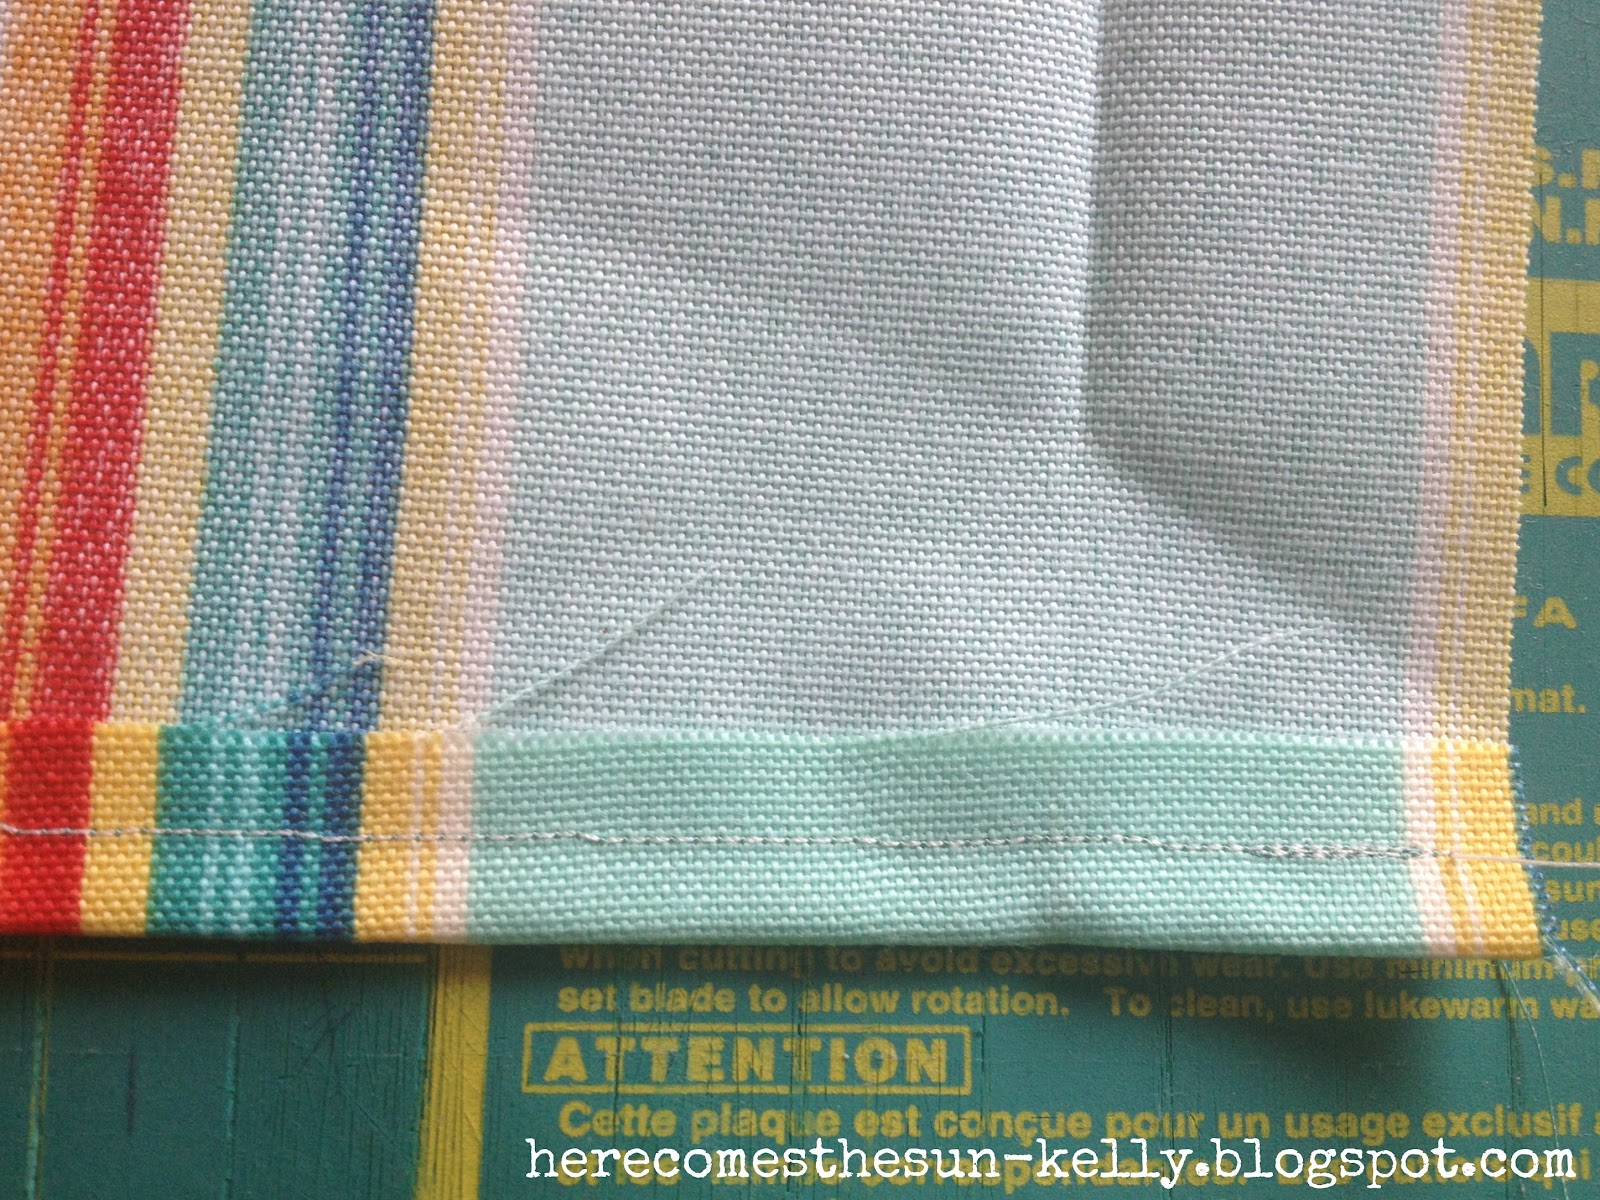
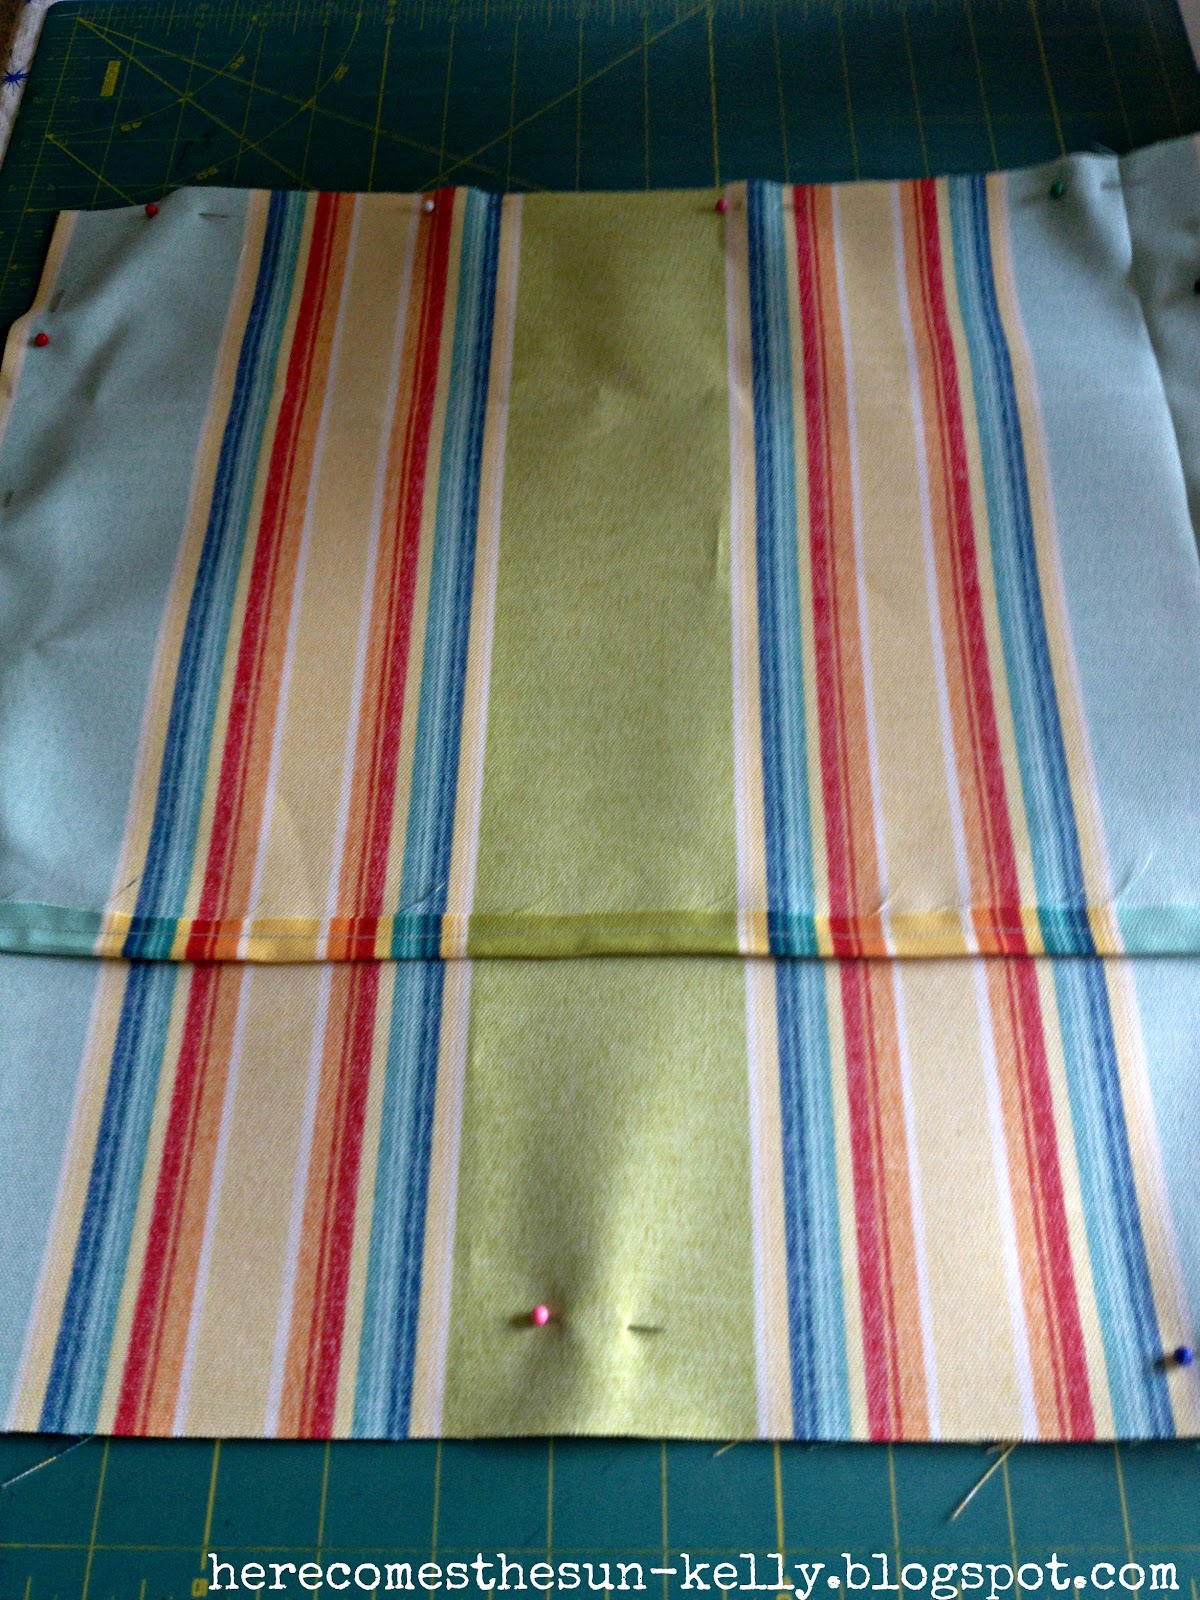
Fold over one long side of each rectangle 1/2″. Press and pin.
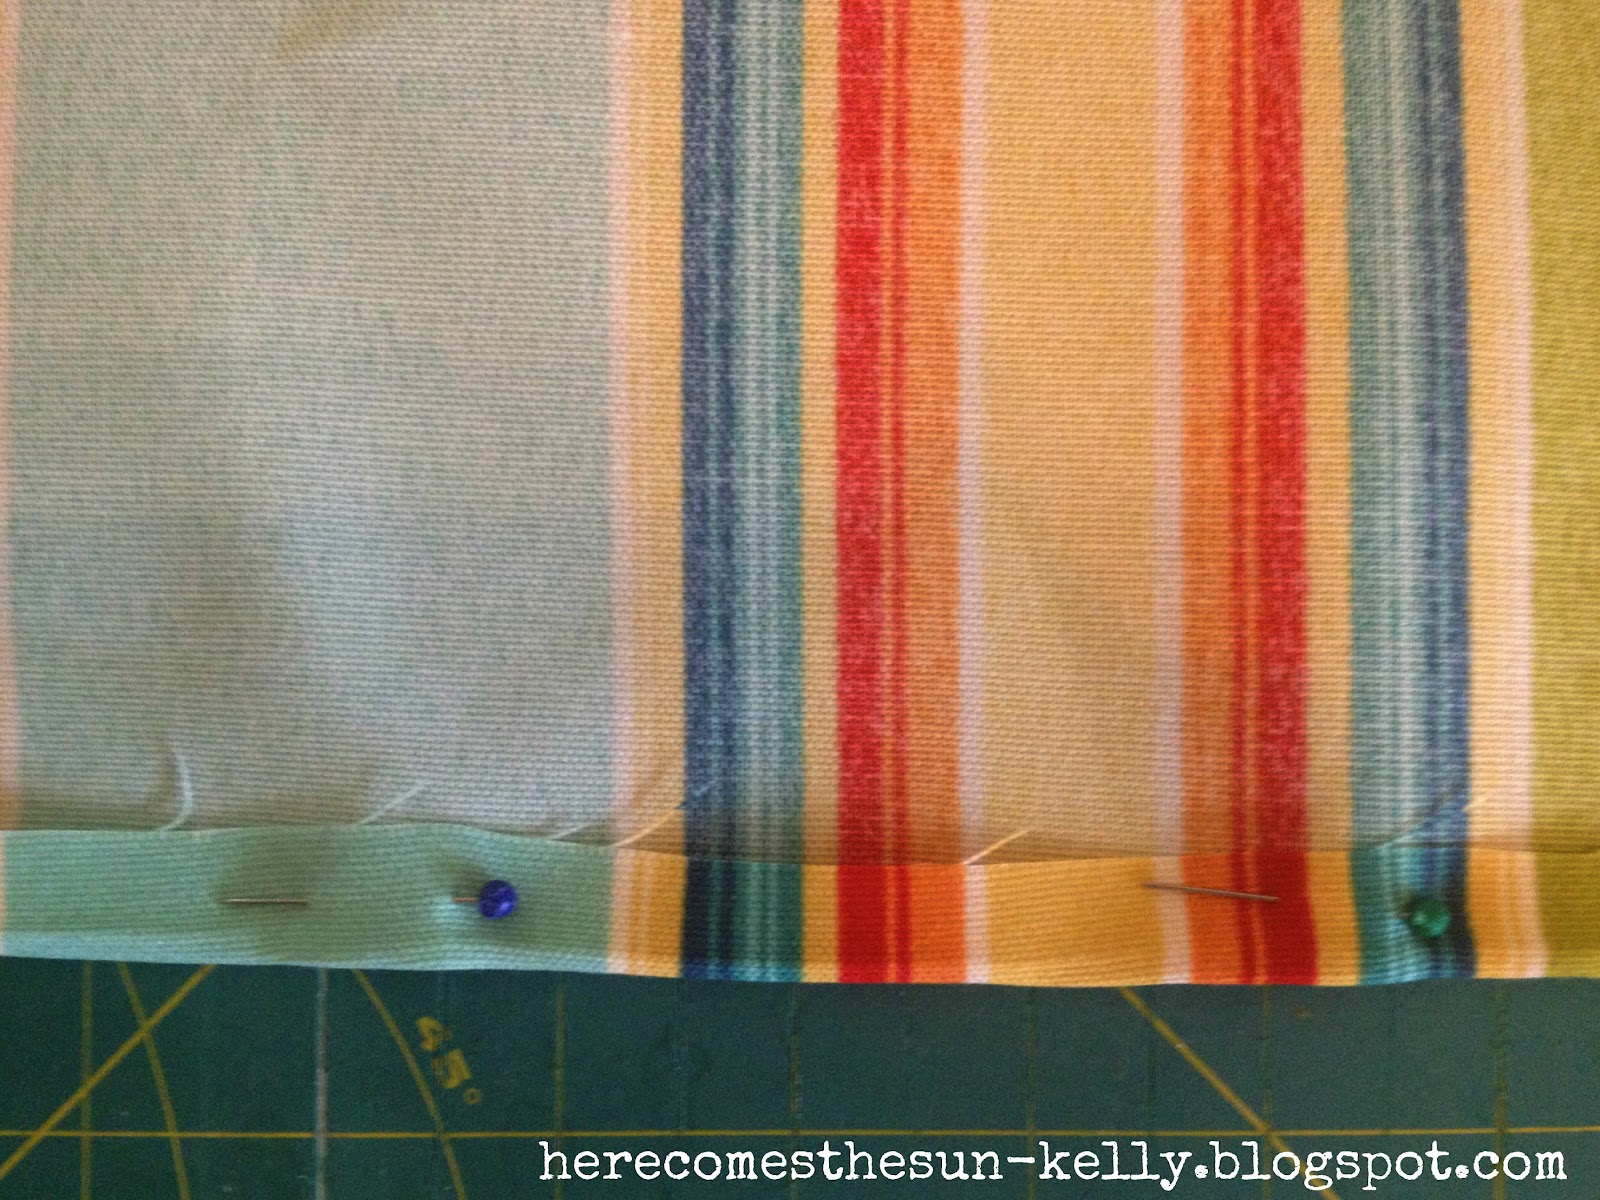
Using a straight stitch, sew 1/4″ from the fold.

Place your square piece of fabric right side up. Lay the two rectangle pieces on top, wrong side up.
The hemmed edges of the rectangles should be overlapping and the raw edges should be matched up with the raw edges of the square.
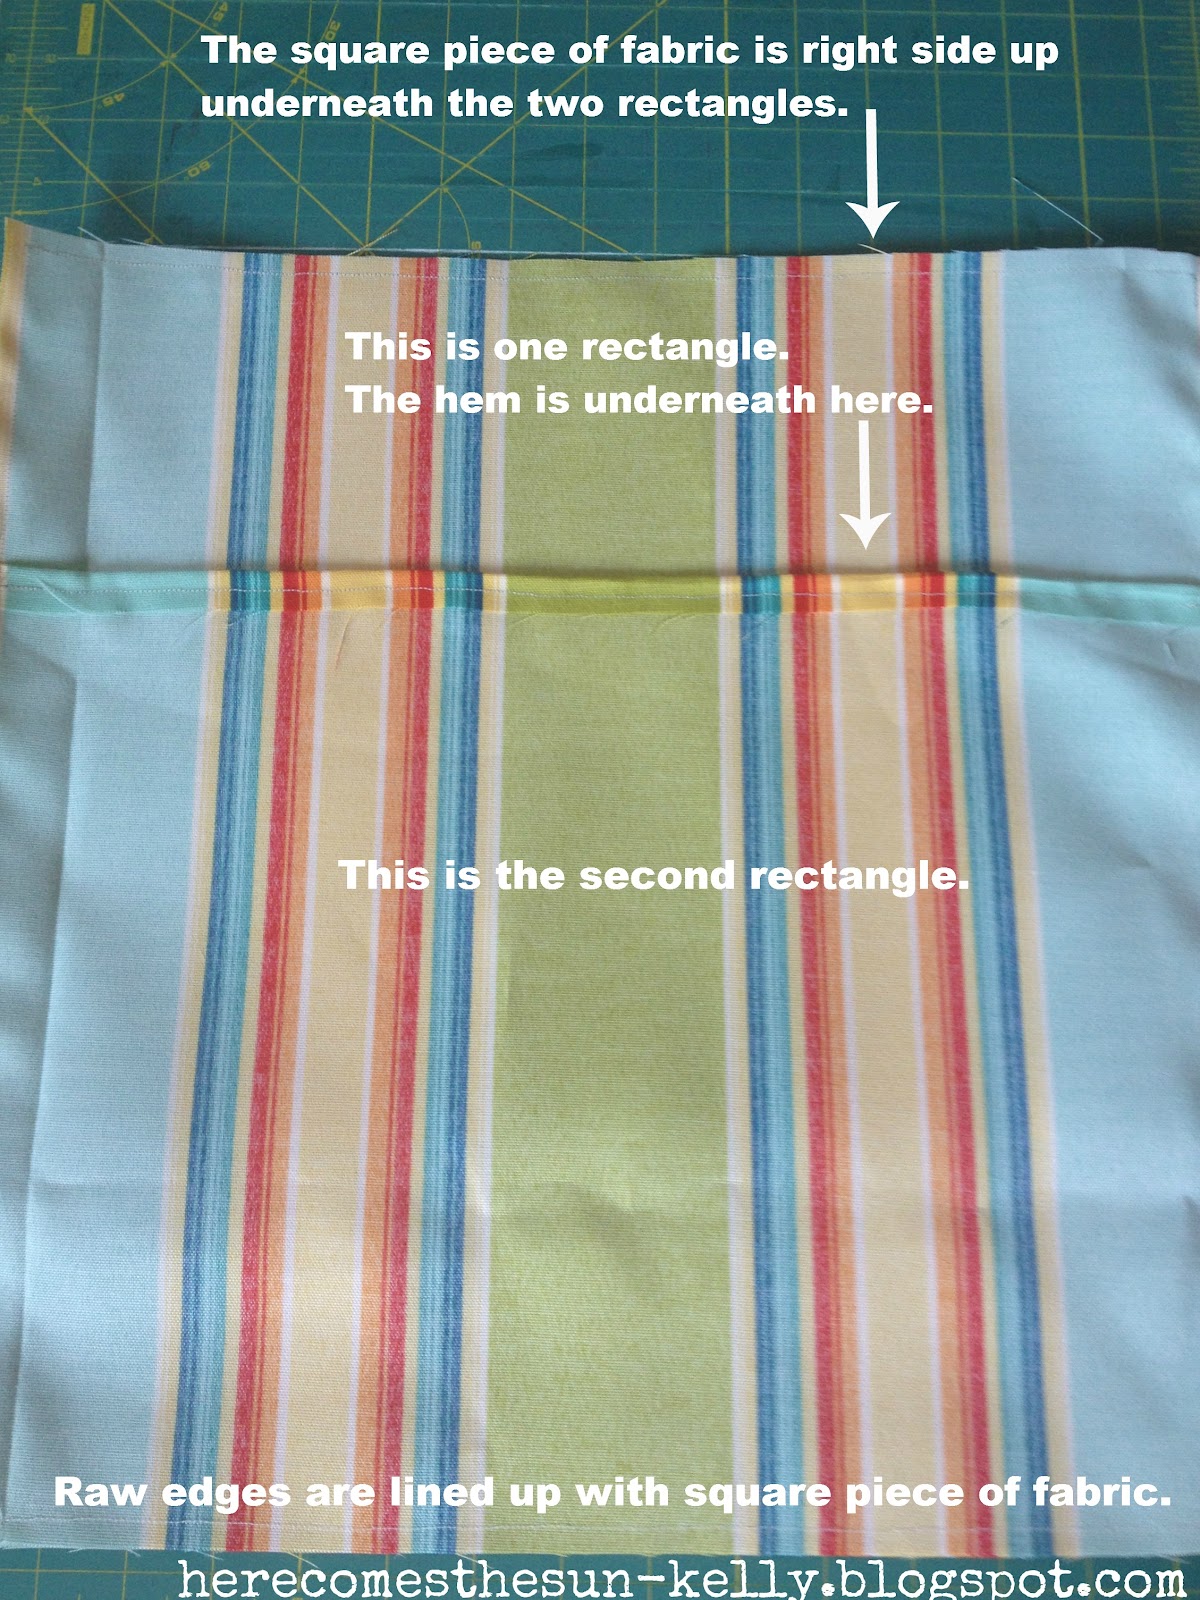
Pin in place. Yes, this photo is upside down compared to the one above. Let’s pretend it’s not, okay?
Sew around the entire pillow using a 1/4″ seam allowance. Back stitch in the corners for added strength.
You now have a pillow cover that is 1/2″ smaller than your pillow. Do not worry. It is ok. Your pillow WILL fit. It will look nice and plump!
Turn the pillow cover inside out and insert your pillow.

Sit back and admire your work!

The key to this project is using fabric specifically designed for outdoor use. It is not as expensive as you may think. I purchased $13.00 worth of fabric during a 50% off sale. That’s $6.50/pillow! Not bad. Not bad at all!
I love that fabric! So bright and summery! Awesome job!
Looks good! That fabric is pretty. Thanks for this tutorial! The step-by-step pics and instructions are super helpful! =) Hope you’re having a great week!
great job!!
would love it if you could share this on my link party – http://serenityyou.blogspot.co.uk/2012/07/serenity-saturday-47.html
Thanks for the tutorial Kelly! I have pillows that I’ve been meaning to recover for our patio furniture all summer!
Nice! I love the fabric! 🙂
Thanks for linking up to the Pomp Party! Pinning this!
Love the fabric of your pillow. Thanks for linking up at Friday Fun Party. Have a nice weekend!
Hi Kelly! these turned out simply beautiful – love your fabric choice. And your easy to follow tutorial. thanks for sharing!
JoAnn
sweetpepperrose.blogspot.com
Love the fabric…so bright and summery! Thank you for sharing at our
Pinteresting Party.
What bright fun sunny pillows! Such a great tutorial and it sounds so easy (I am not a great seamstress) but I bet I could do it. I do have pillows that sure need a make over. Thank you so very much for sharing at Freedom Fridays!
LOVE your stripey fabric and that you are squeezing every cent out of your $40 pillows 😉 Thanks for sharing this at the {what’s shakin’ link party} this week!!
Great job on your pillow! I really like the fabric you picked! It’s always fun to sew!